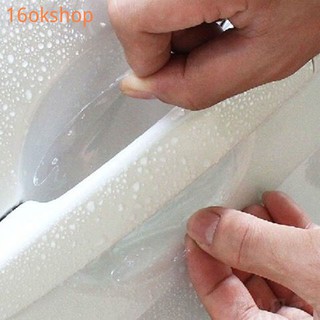
Vender Protección del pomo de la puerta, película de la manija de la puerta del automóvil, etiqueta engomada de la puerta del automóvil, etiqueta engomada a prueba de rayones del tazón de la puerta, etiqueta de protección al mejor precio
5
2
calificaciones
1
vendido
56 MXN
54% OFF
25,64 MXN
| Se envía desde | |
|---|---|
| 1set=4 pcs | Hand stick |
Descripción del producto
[product name]: handle protective film(4Film pack)
[product packaging]: color box
[material]: imitation rhinoceros skin
[color]: transparent
[model]: General
one.Installation method of small car sticker (dry sticker method)
1Clean the car body and keep it dry.
2Determine the position to be pasted. In general, slowly stick and use at the same time Scrape the tool flat and expose the backing paper on one side.
3If the figure is really small, you can also tear off the transparent transfer film and stickers and stick them again. But care must be taken to avoid accidental adhesion.
4After sticking, scrape and press repeatedly. The transparent transfer membrane was removed.
5Use an art knife to cut the door and the seam of the car, and cover it inward.
6Don't let car stickers and cars Any separation or protrusion of the body.
two.Installation method of large vehicle sticker (wet sticker method) Tools: rags, sprinklers, scrapers or credit cards
1Clean the car body and sprinkle water evenly on the parts to be pasted to reduce the viscosity of the sticker and facilitate the adjustment of the position.
2Determine the position to be pasted. Slowly while sticking, while gently scraping with tools, while uncovering paper. 3When meeting the door handle or anti friction strip, cut and wrap the material according to the situation In.
4After the general position of the figure is confirmed, the water and bubbles are scraped off repeatedly. The transparent transfer membrane was removed.
5Draw the door and seam with an art knife Knife, cover it inward.
6Do not let the car sticker and the car body have any separation or protrusion.
7Try to let the moisture in the sticker dry thoroughly. If possible, heat and dry it moderately. According to Weather conditions, wash the car in a day or two.
In order to reduce the installation difficulty of customers, the car stickers we provide have been covered with transfer film in advance. (except the whole continuous Figure)
1Don't wax a week before you decide to dress up your car. Wax will make the sticker not stick firmly. Don't wash the car within three days after the sticker is pasted. Don't paste it in rainy days. The effect will be bad!


